Build and Update
The iAPS app can be built with two methods:
Build iAPS with GitHub using a browser on any computer or tablet
Build iAPS with Script using a Mac with Xcode
The iAPS app can be updated to the latest release or to a development branch when you choose.
Update iAPS with GitHub using a browser on any computer or tablet
Update iAPS with Xcode using a Mac with Xcode
Build iAPS with GitHub
The instructions for using a browser and GitHub to build the iAPS app are found in the iAPS repository.
The instructions at the link above are complete and include the details found beneath the LoopDocs links below.
If those instructions are too sparse for you, look at the LoopDocs instructions, which are very verbose. Between the two, you should be able to figure things out:
If you use the LoopDocs instructions, you will need this information to build iAPS (rather than Loop):
Fork from: https://github.com/Artificial-Pancreas/iAPS
Identifier Nameswill be:FreeAPS,FreeAPSWatch,FreeAPSWatch WatchKit ExtensionIdentifierswill be:ru.artpancreas.TEAMID.FreeAPSru.artpancreas.TEAMID.FreeAPS.watchkitappru.artpancreas.TEAMID.FreeAPS.watchkitapp.watchkitextension
The
App Groupname is the same as for Loop:group.com.TEAMID.loopkit.LoopGroupYou must add this
App Groupto all 3 identifiersThe
FreeAPS Identifier, in addition to theApp Group, must also have:HealthKitandNFC Tag Readingenabled (which should be automatic)In
App Store Connect, theBundle IDfor iAPS will be:ru.artpancreas.TEAMID.FreeAPS
Update iAPS with GitHub
Open your fork at your GitHub username.
Look to see if your fork is up to date
If your fork shows that your branch is behind, sync the branch to get the latest updates
Before building, you can Verify iAPS Version
If you selected a GitHub Personal Access Token (GH_PAT) that never expires, then simply select Actions: 4. Build iAPS and wait about an hour for your updated app to appear in TestFlight.
If you token has expired, create a new one (and set it to never expire) and update the GH_PAT in your iAPS secrets. Then you can build your updated code.
Build iAPS with Script
A build script is available that will
Download either the main or dev branch for iAPS
Create the automatic signing file
Offer to remove the provisioning profiles from your computer
This ensures the build will last a full year
Provide instructions for how to build the app once Xcode opens
Opens Xcode with your new download.
To execute the build script, open a terminal on your Mac and then copy and paste the command below into the terminal. Read and follow the directions.
/bin/bash -c "$(curl -fsSL \
  https://raw.githubusercontent.com/loopnlearn/loopbuildscripts/main/Build_iAPS.sh)"
The download is placed in your Downloads folder in a directory called Build_iAPS. The downloaded clone is found in a folder with the branch name, date and time encoded.
This script is similar to one used to build Loop. Extensive instructions are provided on the LoopDocs: Build Select Script page. If you need additional information, review that section and then return. The script for iAPS must be run stand-alone; it is not part of the Build Select Script.
Build Errors
Should you encounter any build issues, please have a look at the LoopDocs Build errors page. Not everything on that page is relevant for building iAPS, but many potential issues will likely be covered there. You will also get useful advice about what info to provide if you need to ask for help. When you have identified the error message(s), please use the search tool in LoopDocs to see if your error is mentioned.
If you need it, you are most likely to get help in one of these groups:
Facebook groups like “Loop and Learn” and “Looped” may become useful too, but these groups are still mostly focussed on Loop
xDrip4iOS or Glucose Direct as CGM Source
Please note that LibreTransmitter is provided as part of iAPS, so you are not required to use either xDrip4iOS or Glucose Direct to interact with your compatible Libre sensor using iAPS.
If you want to use xDrip4iOS or Glucose Direct as a CGM source via “shared app group”, you must also build that app from source with the same developer ID used for building iAPS. Scripts are available for these apps as well. All scripts follow the same download and build pattern, and configure automatic signing files for you.
/bin/bash -c "$(curl -fsSL \
  https://raw.githubusercontent.com/loopnlearn/loopbuildscripts/main/BuildxDrip4iOS.sh)"
/bin/bash -c "$(curl -fsSL \
  https://raw.githubusercontent.com/loopnlearn/loopbuildscripts/main/BuildGlucoseDirect.sh)"
The download is placed in your Downloads folder in a directory called BuildxDrip4iOS or BuildGlucoseDirect respectively. The downloaded clone is found in a folder with the branch name, date and time encoded.
Alternative Branch
Sometimes, specific branches are offered for testing. Any desired branch can be cloned using the Build_iAPS script. After the final quote of the script command, add a space, hyphen, space and branch_name. An example is shown below; replace branch_name with your desired branch. Note that specific branches like this are not deleted as part of the Delete Old Downloads utility discussed in Maintenance Utilities.
/bin/bash -c "$(curl -fsSL \
  https://raw.githubusercontent.com/loopnlearn/loopbuildscripts/main/Build_iAPS.sh)" - branch_name
Maintenance Utilities
Several maintenance utilities are availble with the Build Select Script which is typically used with Loop. For more information, refer to Loop and Learn: Build Select Script documentation. Issue the command below in your terminal, select Option 3 for Maintenance Utilities. Then choose from these options:
Delete Old Downloads
Clean Derived Data
Xcode Cleanup (The Big One)
Return to Menu
/bin/bash -c "$(curl -fsSL \
  https://raw.githubusercontent.com/loopnlearn/loopbuildscripts/main/BuildSelectScript.sh)"
Once each option completes, you are returned to the top menu, so must select Maintenance Utilities again if desired.
Update iAPS with Xcode
The recommendation is to use the Xcode Source Control features to update your code.
If you prefer to use the command line interface, skip ahead to Update iAPS with CLI.
Update iAPS with Source Control
Note Released code is found in the main branch. These figures show the older name of master rather than main.
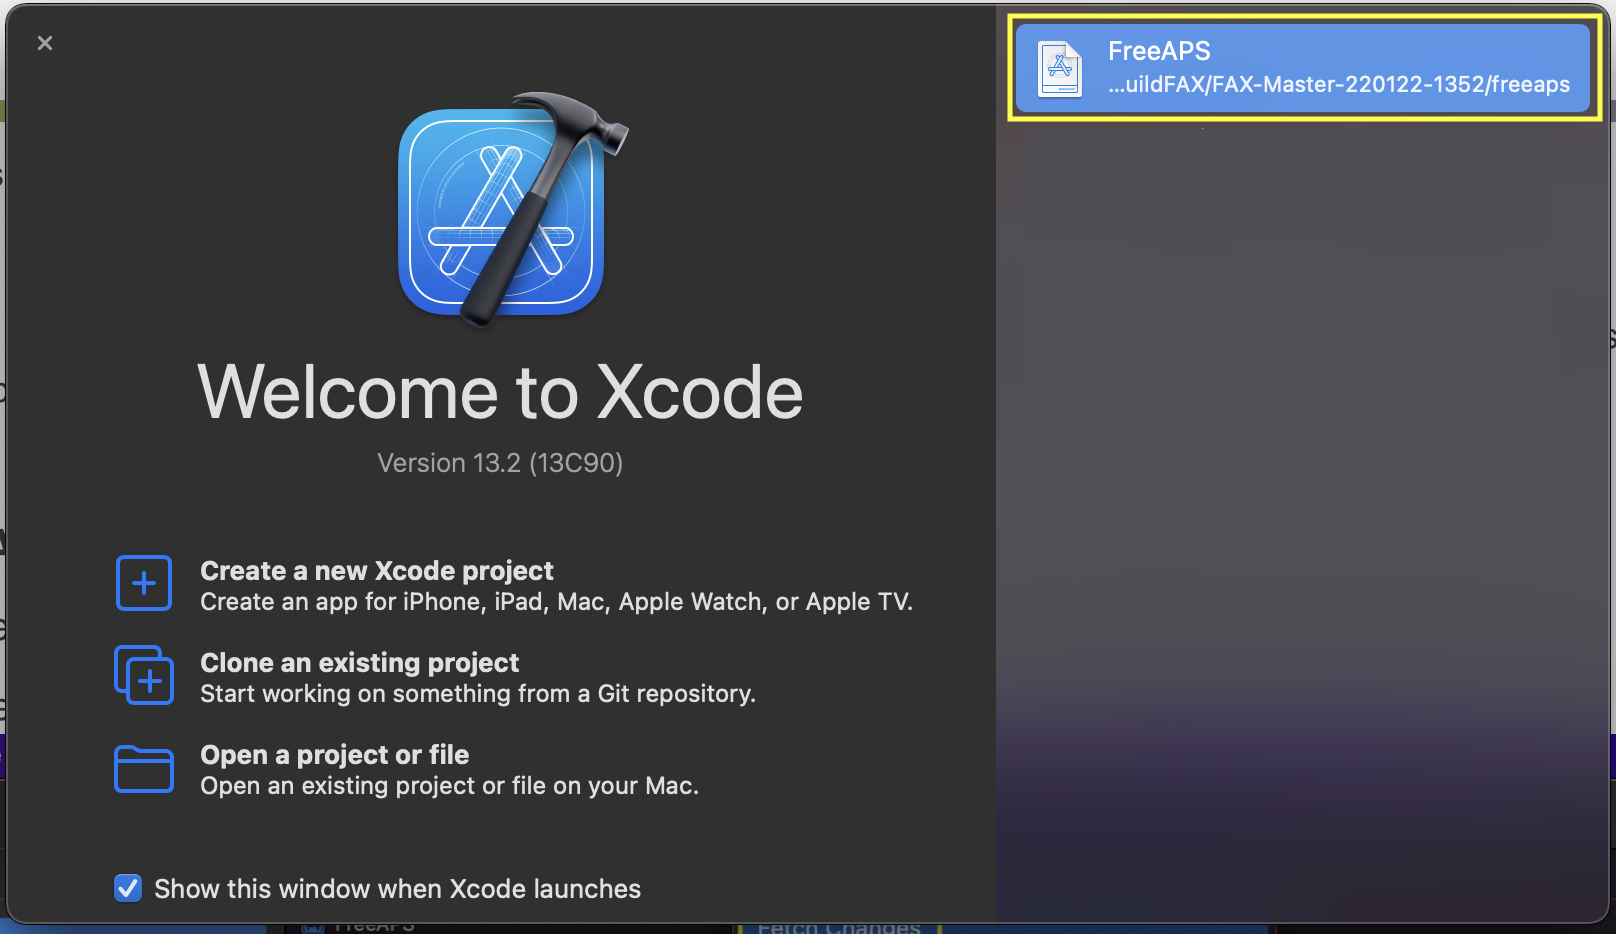
Open Xcode. If your iAPS (FreeAPS) workspace is not already open for you, you will probably find it in the recent projects as shown in the graphic below. You can also pull down the Xcode menu for File, select Open Recent and find your workspace.
 {width=”600”}
{align=”center”}
{width=”600”}
{align=”center”}
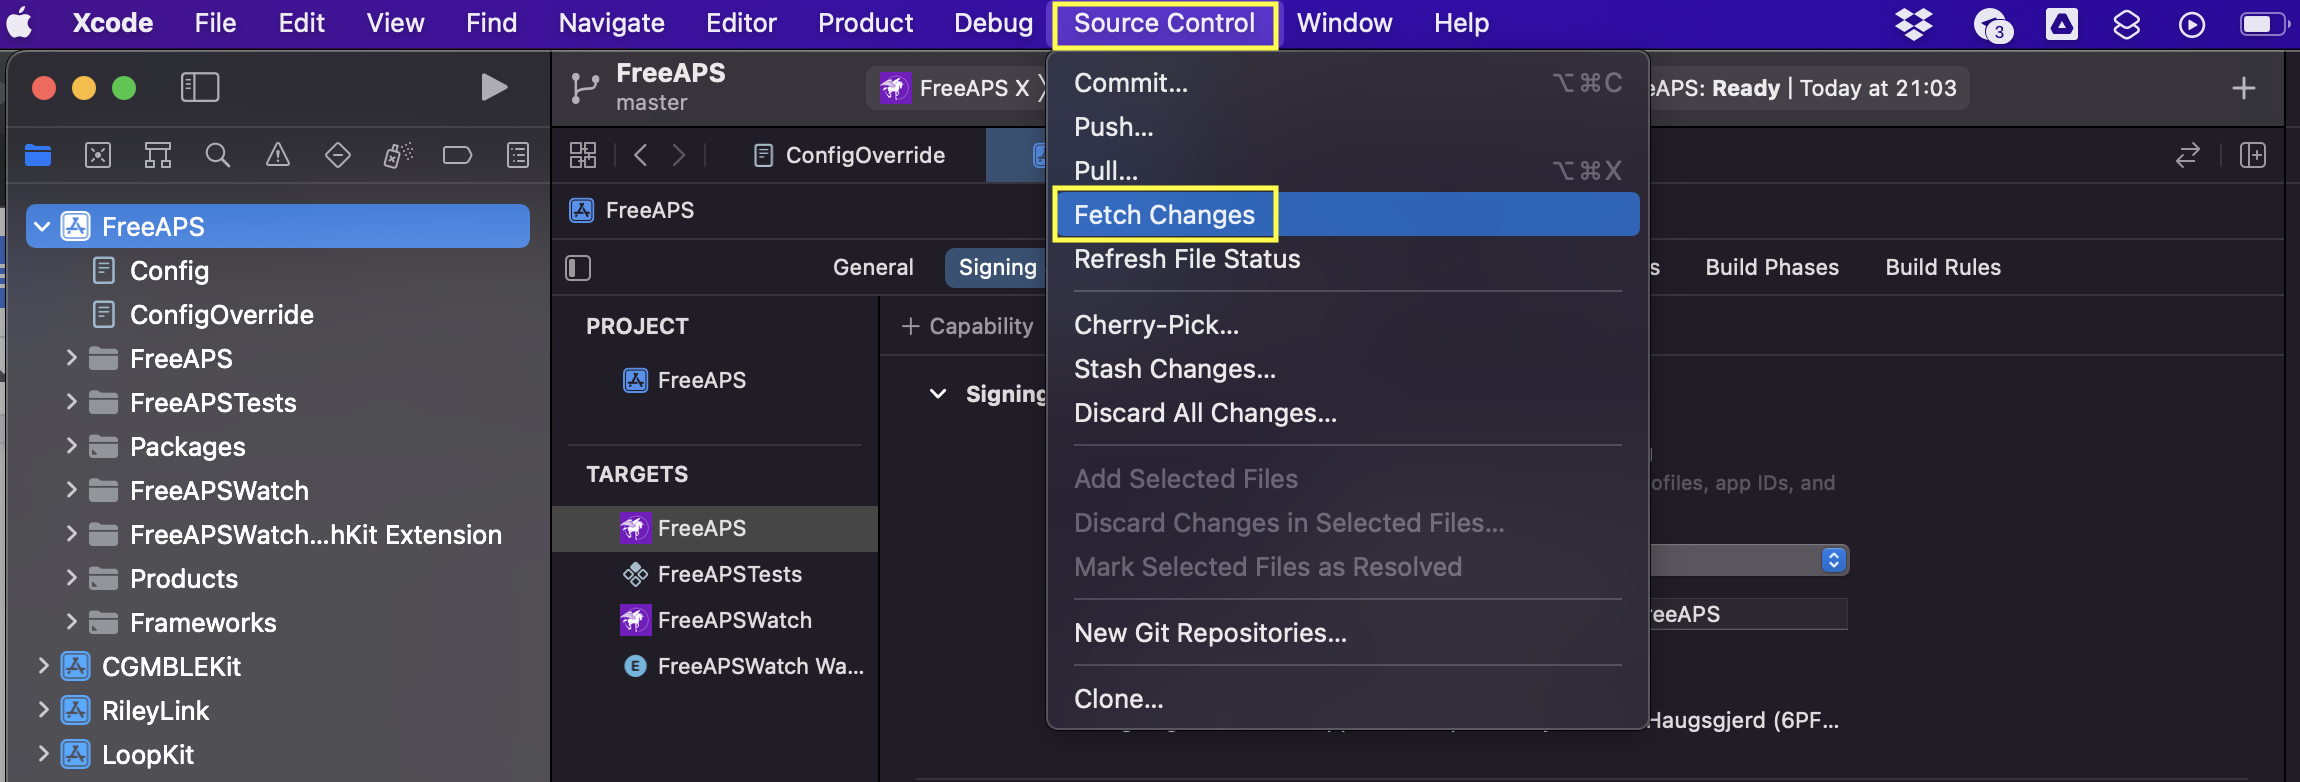
Refer to the graphic below:
Click Source Control
Choose
Fetch changes
 {width=”600”}
{align=”center”}
{width=”600”}
{align=”center”}
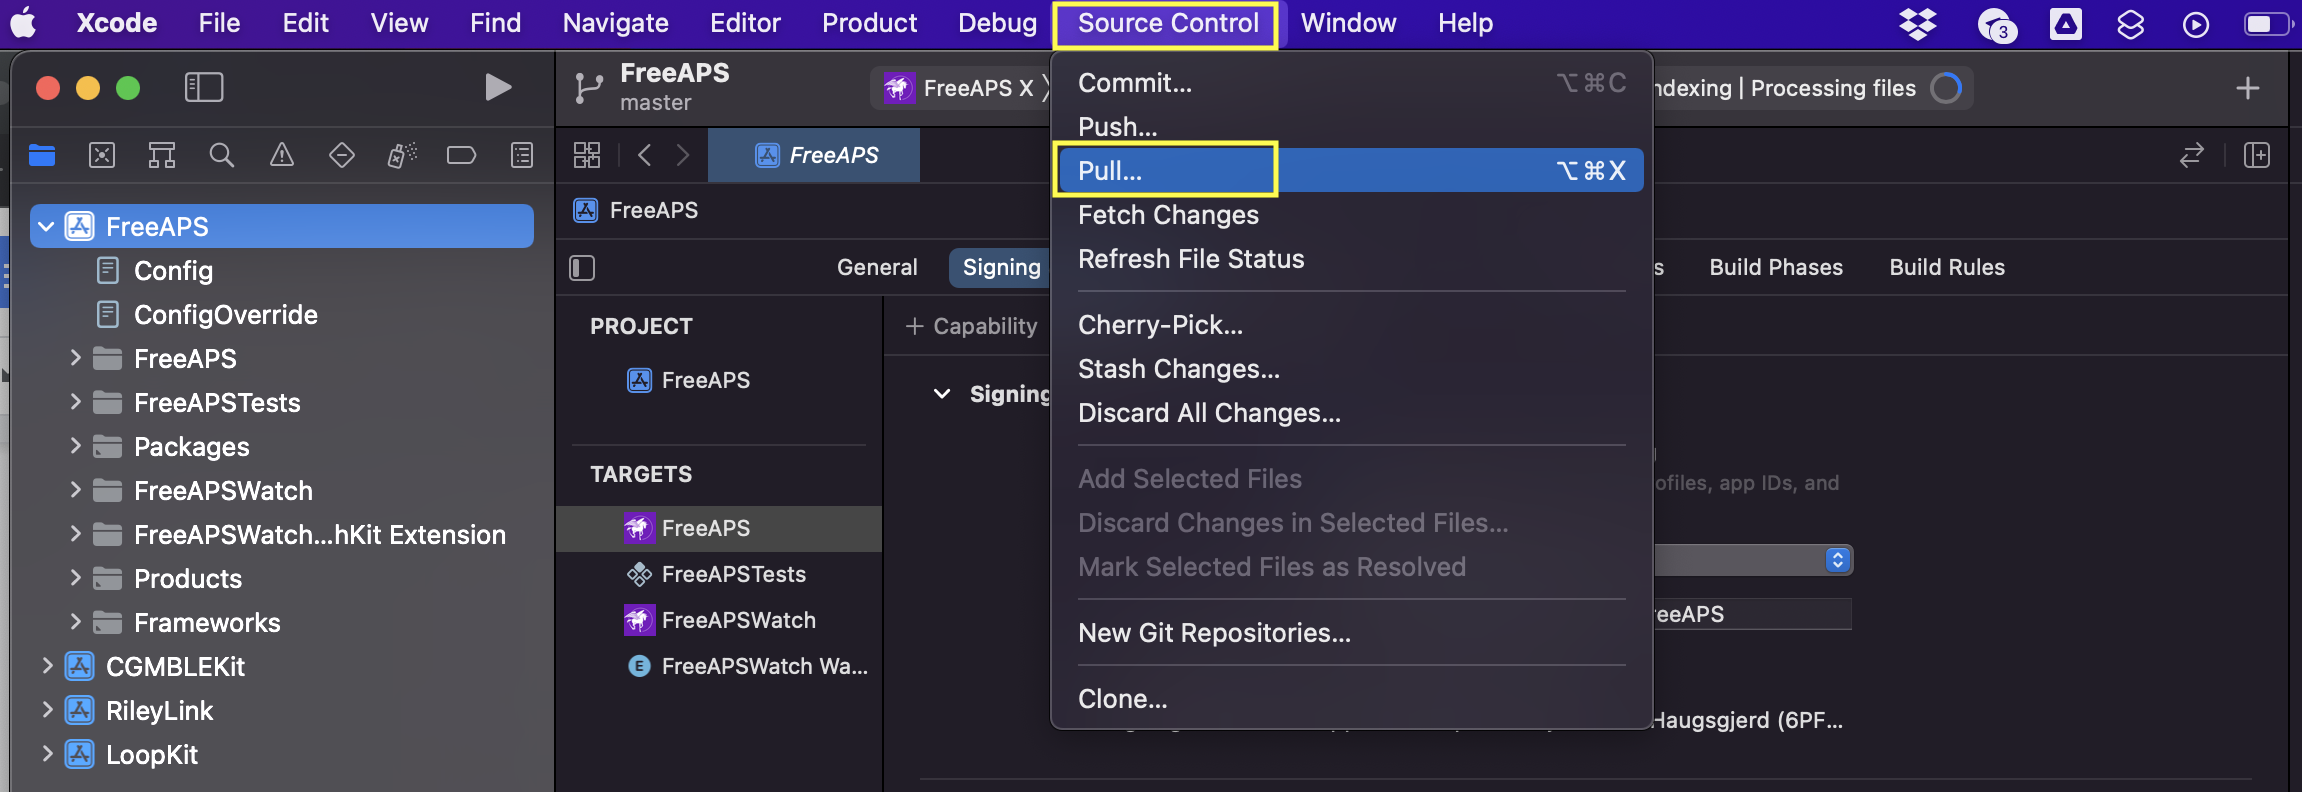
Refer to the graphic below:
Click Source Control again
Select
Pull…
 {width=”600”}
{align=”center”}
{width=”600”}
{align=”center”}
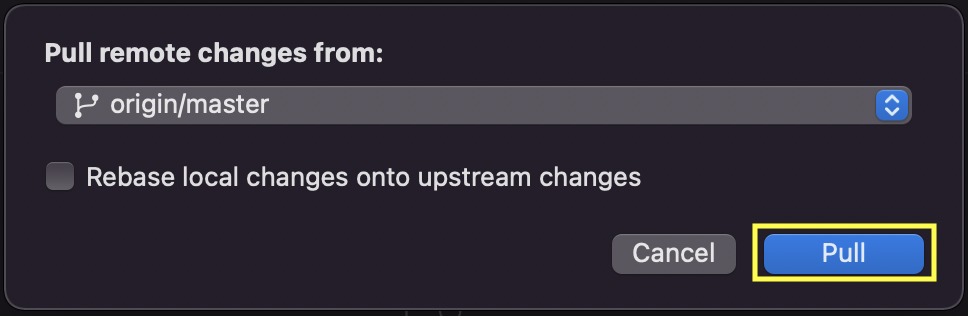
Refer to the graphic below:
Select the branch to pull from
Click
Pull
The correct branch should already be selected for you. If you built from main, select main. If you built from dev, select dev. (This graphic has the older branch name of master.)
 {width=”500”}
{align=”center”}
{width=”500”}
{align=”center”}
The last steps are only relevant if you made any changes to the code:
You may see a pop up asking to stash your changes. In that case, name the stashed changes to something that is meaningful to you.
Select “Apply Stash After Operation”.
Click “Stash and Pull”
The iAPS code is now updated. That was easy, wasn’t it? If you used the build script that automatically creates your ConfigOverride file, the targets are already signed, and you are ready to build the iAPS app to your phone.
The next section is only for those who prefer to use the command line interface for git. Skip ahead to Verify iAPS Version.
Update iAPS with CLI
Use finder to locate the directory where the Build_iAPS script saved the code. The directory is named after the branch with the date and time for the download:
Released (main) branch: Downloads/Build_iAPS/iAPS_main-[date-time]/iAPS
example: ~/Downloads/Build_iAPS/iAPS_main-220122-1352/iAPS
Development (dev) branch: Downloads/Build_iAPS/iAPS_dev-[date-time]/iAPS
example: ~/Downloads/Build_iAPS/iAPS_dev-220108-1827/iAPS
Use finder to open a Terminal window at the iAPS directory by right-clicking on it and select New Terminal at Folder.
Copy each line below and paste into the terminal window one at a line and hit enter for each line:
git stash
git fetch
git pull
git stash pop
If the final git stash pop had errors, you will need to repeat any customizations that you had in your prior code - they are no longer compatible with the updated code.
The iAPS code is now updated. To open the workspace in Xcode, type xed . in your terminal window.
The targets should be signed and you are ready to build the iAPS app to your phone.
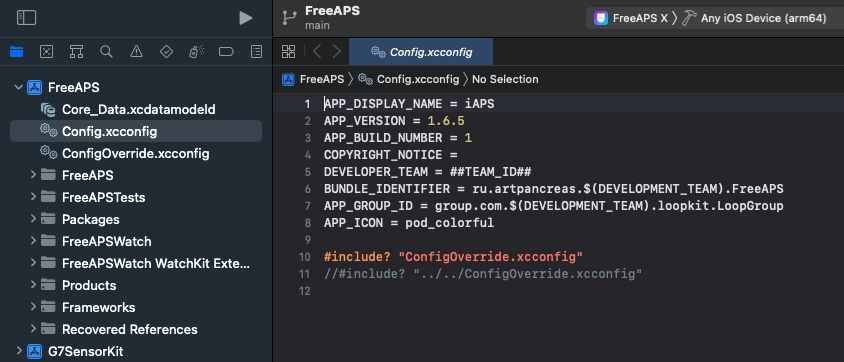
Verify iAPS Version
Verify the iAPS code was successfully updated by examining the APP_VERSION value shown in the Config.xcconfig file. (Refer to the graphic below.) Make sure what is shown in your Xcode display matches the expected version in the iAPS GitHub Releases page.
If you are using the GitHub method, you can view this same file in your fork of the iAPS repository.
 {width=”600”}
{align=”center”}
{width=”600”}
{align=”center”}